
When undertaking a budget van conversion, installing a campervan canopy is the quintessential finishing touch for outdoor luxury.
Back when we were first converting our camper, I was convinced we had to have one. That was, until we finally did some research on costs.
Initially, it was a little deflating.
How much to buy new?
Not cheap. In fact, some seemed astronomical going well into the hundreds, even hitting the thousand dollar mark in Canada!
So we knew buying one new was not an option for us.
Note: If you’re reading this from the UK then you’re in luck, as new, pre-made awnings down appear to be sustainably cheaper. Just make sure do your research before committing to a build.
What about a second hand awning?
We would say keeping an eye-out for second hand deals is definitely a viable option.
At the time we were searching, there were a couple that came up around the $250 mark but these were snatched up almost instantly.
Even these seemingly ‘cheap’ options weren’t fault free and might have a snag in the material or it had a broken zipper, for example.
Attaching the campervan canopy
This might seem a flippant comment but, remember that your awning has to actually attach to something on your camper. This might require securing a fastening on the side of your camper or, quite often, you may need to install roof racks.
If you have what you need already, then perfect. If you don’t however, be sure to factor in that extra cost in addition to your new or second-hand campervan canopy.
This was what ultimately put us off purchasing a second hand awning. Roof racks for our Ford E250 (aka Rhonda) were going to cost another hundred plus. Not to mention the added weight on fuel consumption (she was already a hefty and thirsty lady!).
The alternative
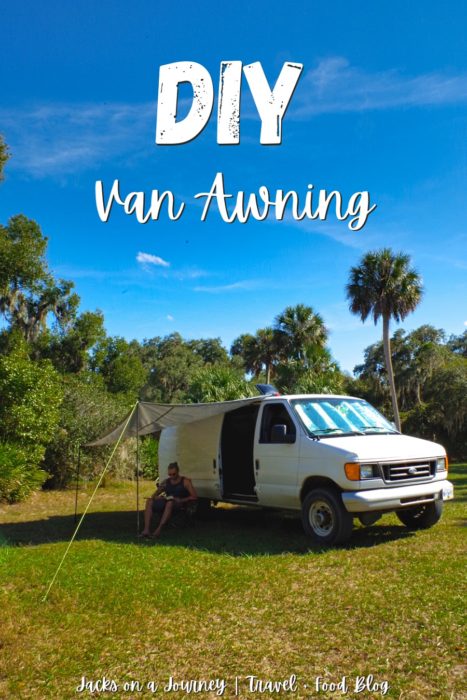
A DIY van awning.
With a scheduled nine month road trip planned, we came to the conclusion that if we wanted a campervan canopy, we would have to build it ourselves, on the cheap.
We found inspiration from others online who had found themselves in a similar dilemma.
While still valuable, the main downfall of other DIY van awnings is that they depended on a vehicle having roof racks. As mentioned, this was an added cost and hassle we were keen to avoid.
So we got creative…
The DIY van awning structure
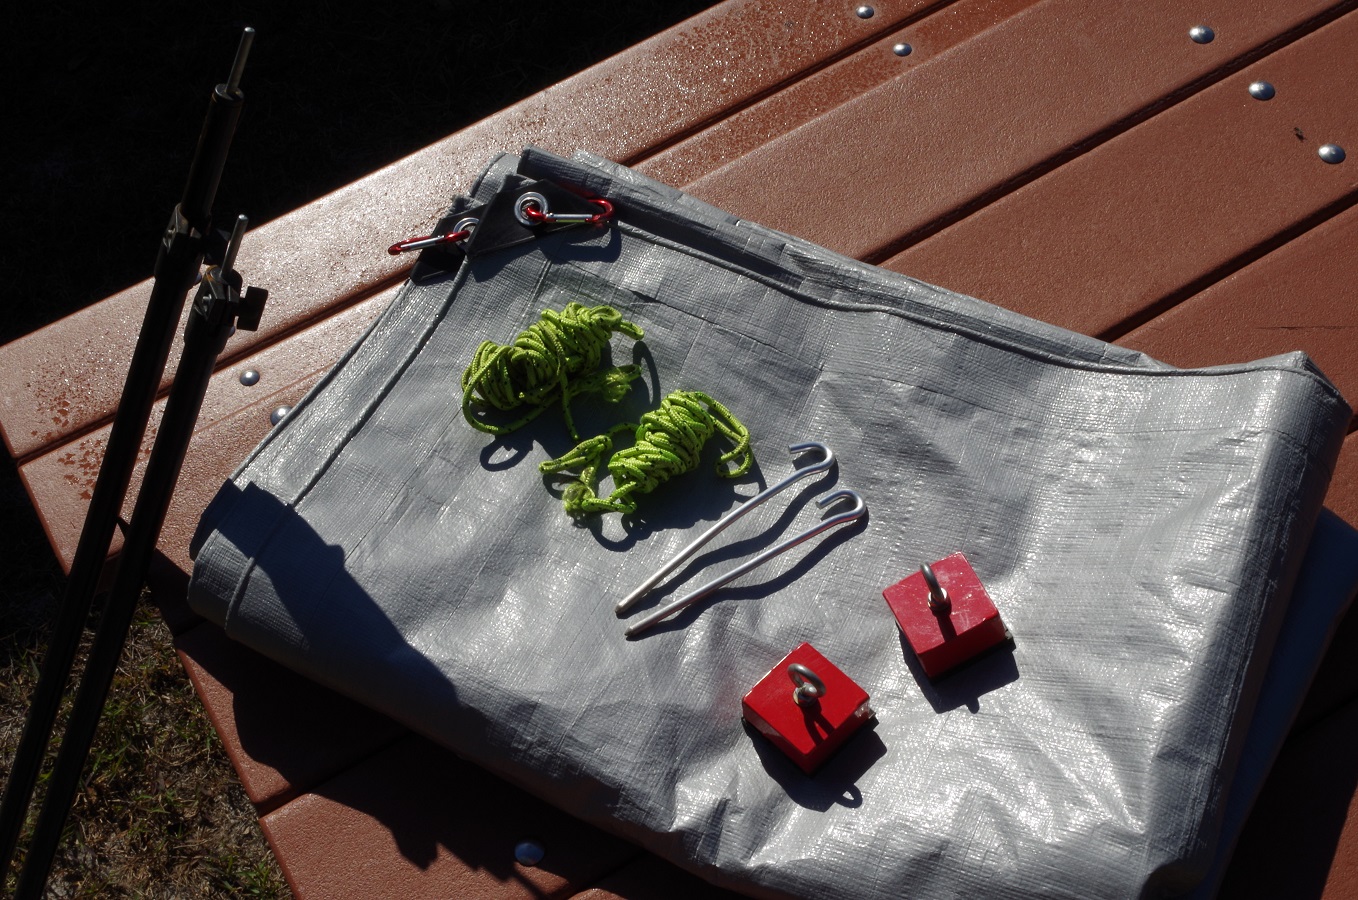
The first step is purchasing the necessary tools. Listed below is all the equipment that campers will need to create their own DIY van awning, without the need for roof racks.
Another bonus is this non-intrusive structure doesn’t require drilling any holes in your vehicle; that’s always a win! Plus, it makes this awning more versatile, meaning weekend road trippers can use it for their car even.
So, what did we buy?
- 1 x Heavy duty tarp
We think it’s important to focus on the ‘heavy duty’ part. The last thing you want is a flimsy tarp that tears at the slightest pull. Buy whatever size is preferred but we went for an 8′ x 10′, which we recommend.
Often buying items like this online can be more expensive, in our opinion. Check out your local hardware store to shop prices. We picked up ours for $15 CAD.
- 2 x Carabiners
Another item that’s a hardware store or even dollarstore purchase. You shouldn’t expect to pay more than $1 for a carabiner to serve this function.
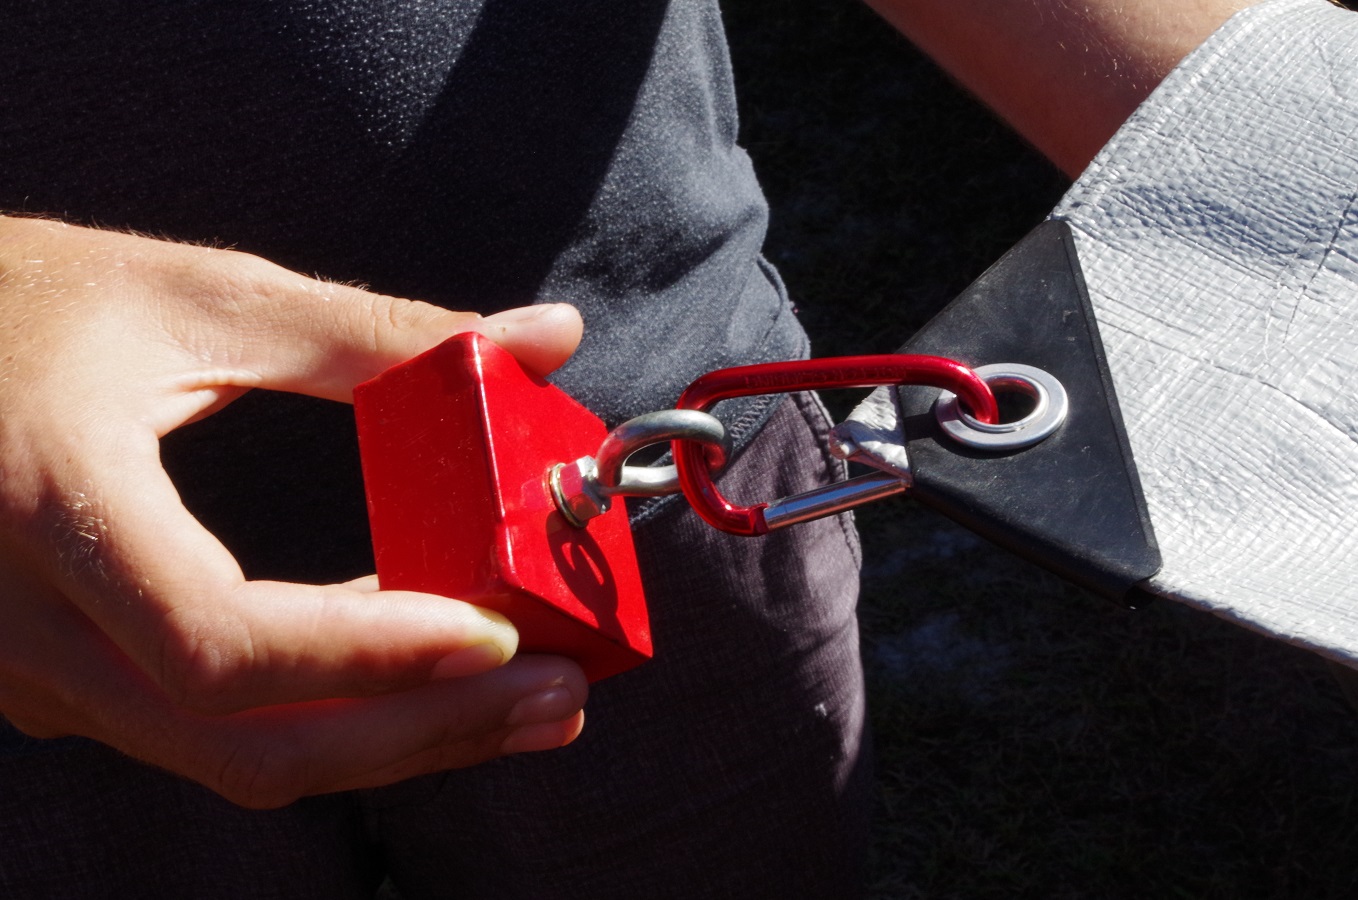
- 2 x Heavy duty magnets
For this one, an online purchase is your easiest bet. We were very impressed with this brand of magnet, so we do recommend.
We bought two of the 100lb pull magnets but for a few dollars extra each, it would be worth getting the 150lb pull magnets for extra DIY van awning rigidity.
These are the most costly items of this whole build with each magnet costing $35 CAD.
- 2 x Extendable camping poles
Another item that might be best done from your local hardware store. We picked up our adjustable tarp poles for $12 each from Canadian Tire. Sears might be the best option from the States.
Note that you want to ensure they extend at least 7ft to create the angles needed to create rain pooling on the awning.
- Guy rope/Tent rope
You only need two lengths of rope around 12-15ft each. And make sure it’s decent quality, maybe 8mm thick.
The frustration here can be that to get the length you need, you still have to buy 65ft of the stuff. In Canada, the camping culture meant we had friends with plenty of rope to spare; great for our penny-pinching DIY van awning!
If you do need to purchase guy rope, it’s luckily not super pricey and shouldn’t set you back much more than $5.
Note: Loops will need to be tied to each end of both guy ropes. Thanks to our days working on dive boats, we are well-educated on the trusty bowline.
- 2 x Tent pegs
While only two tent pegs are needed to build the DIY van awning, we recommend having a couple spares.
These can be purchased from a hardware store or dollar store, ideally individually. Regardless you shouldn’t really be paying more than $1 per peg.
And that’s it!
All in all, this budget awning is attainable for less than $100, at least if you’re in Canada like we were. I can’t imagine prices fluctuate too dramatically for the States however it might be somewhat different in the UK.
Just make sure to do your research before investing.
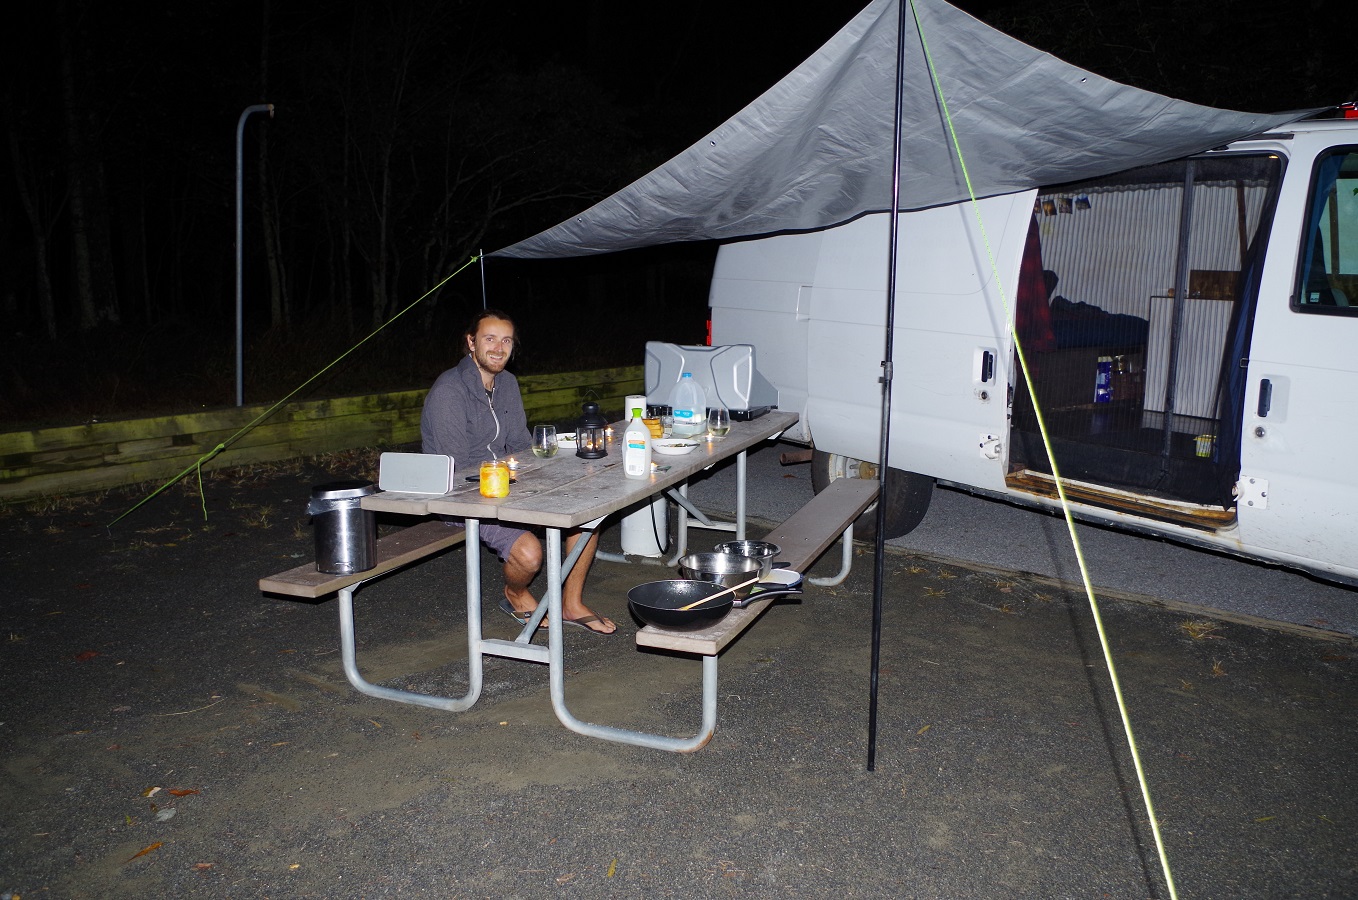
And remember the key benefit of this DIY van awning is you don’t need roof racks or to drill into your vehicle!
The DIY van awning build
I will start with a full disclosure. It did take us a couple of runs to nail this process down.
Hopefully our step-by-step guide should eliminate some earlier teething problems we faced and help you pick it up more quickly. If nothing else, then hopefully this post can serve as some inspiration for you fellow vanlifers!
Step 1
Attach your carabiners to the magnets. Then attach the carabiners to two of the tarps corners.
Step 2
Place both magnets onto the roof of your vehicle, as wide as the tarp will go.
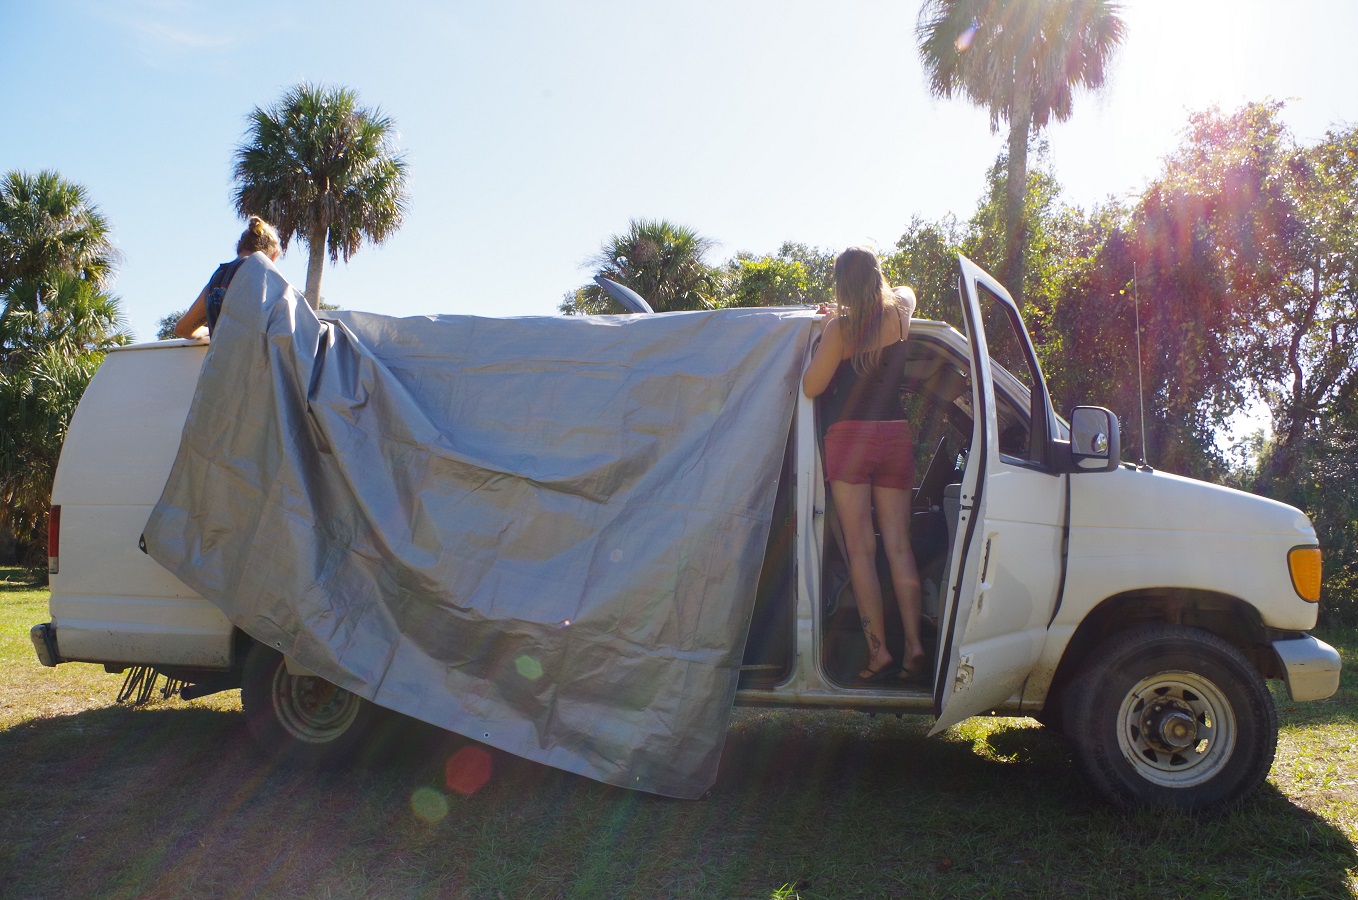
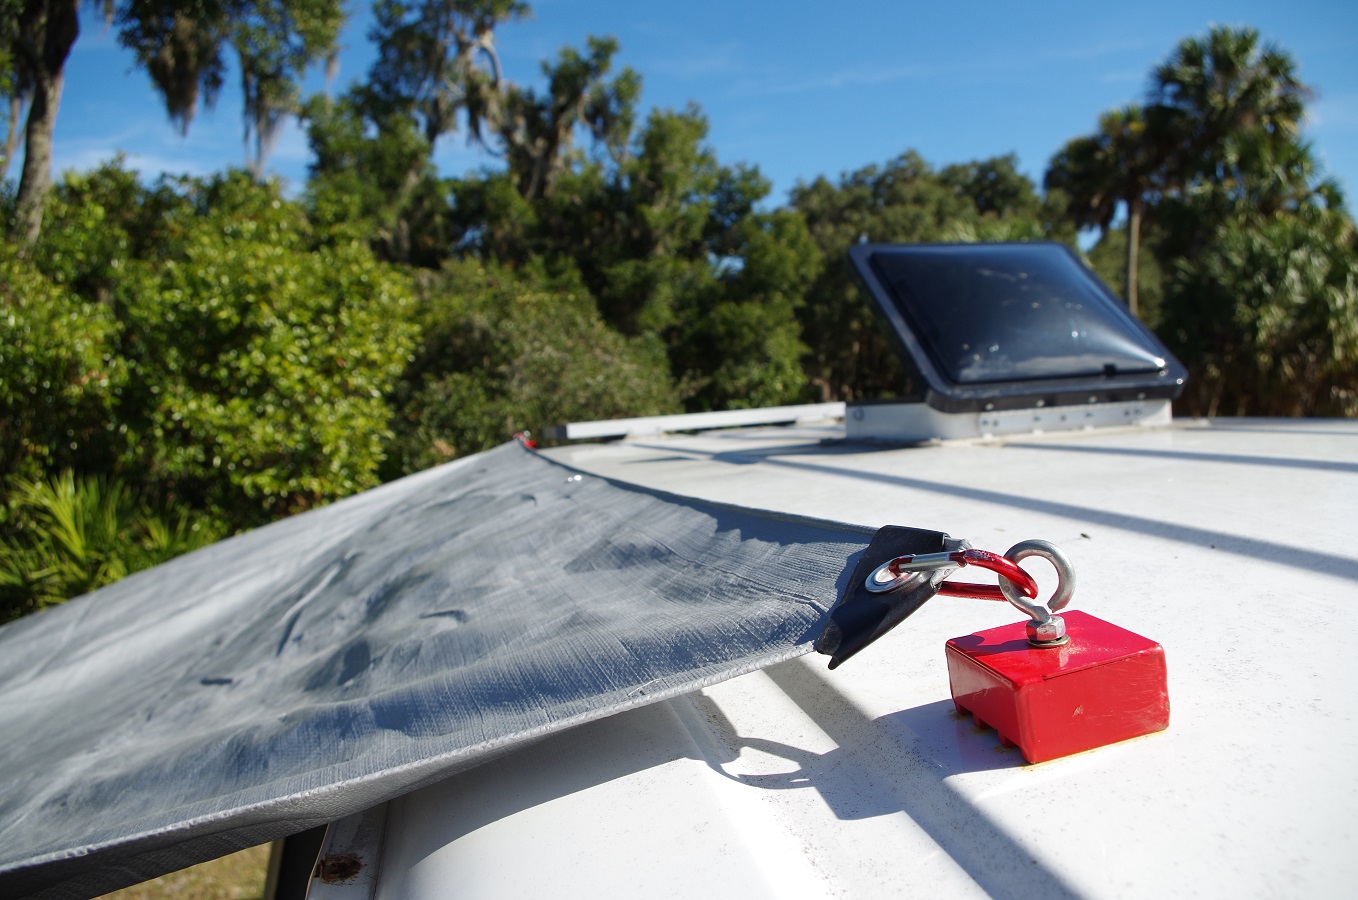
Step 3
It is possible to do this step alone but it’s much easier with two people working simultaneously.
Take the remaining two free corners of the tarp and place the grommets (holes) over the top of the tarp pole. Next take an end of guy rope and hook the guy rope-loop over the top of the tarp.
Keep the tarp relatively taut during this process.

It took us several attempts for this fact to sink in.

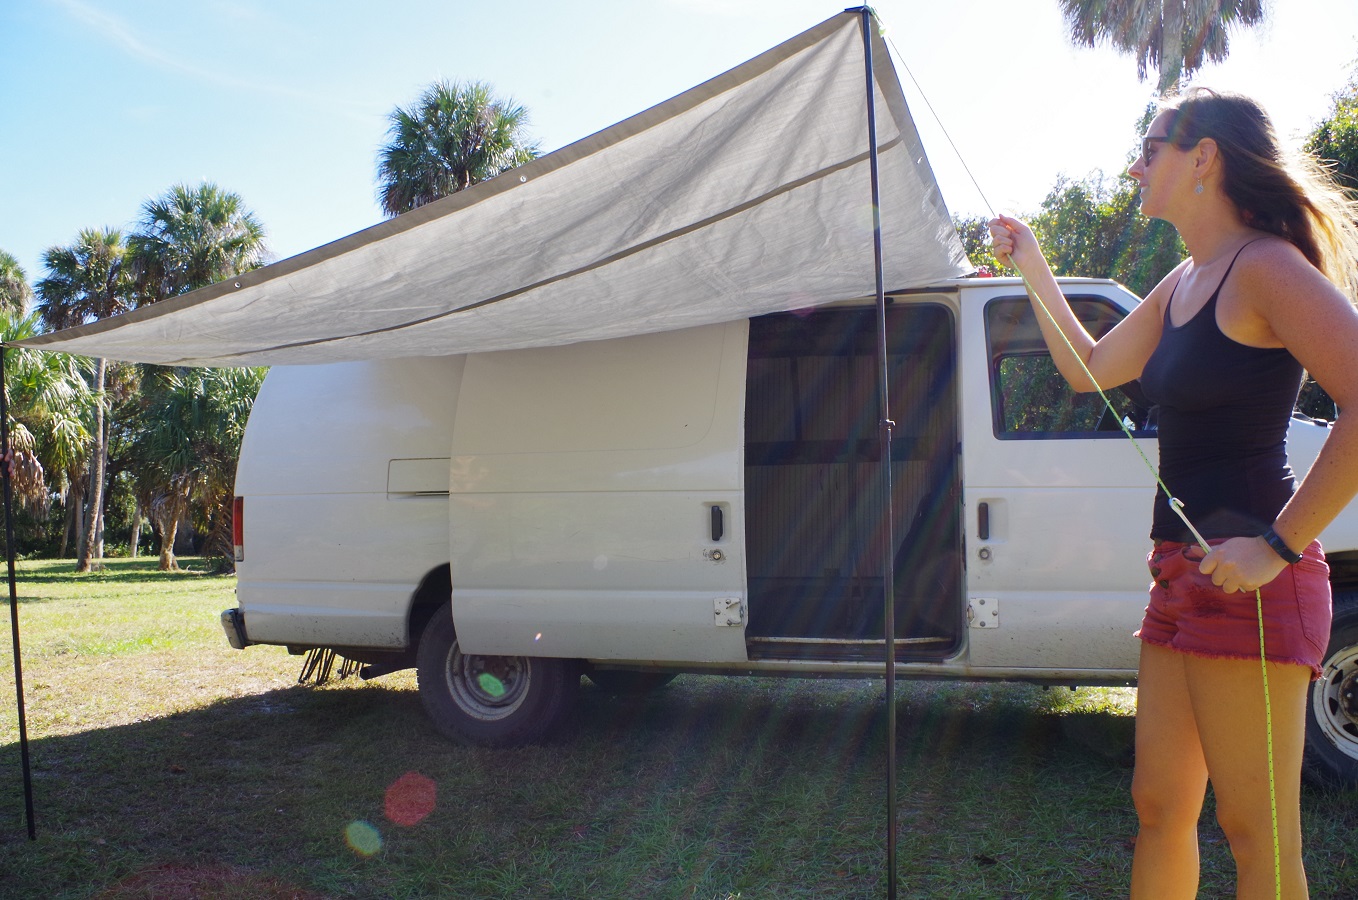
Step 4
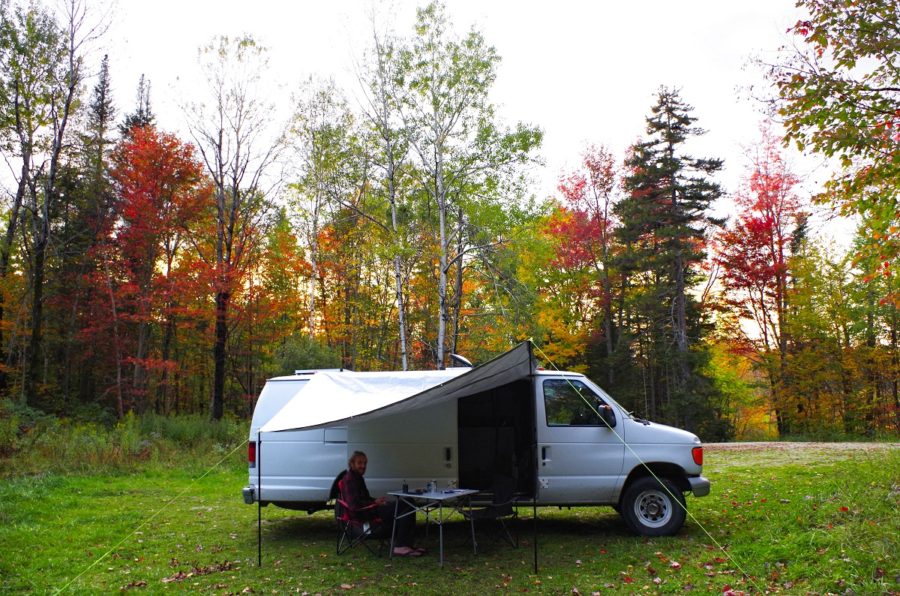
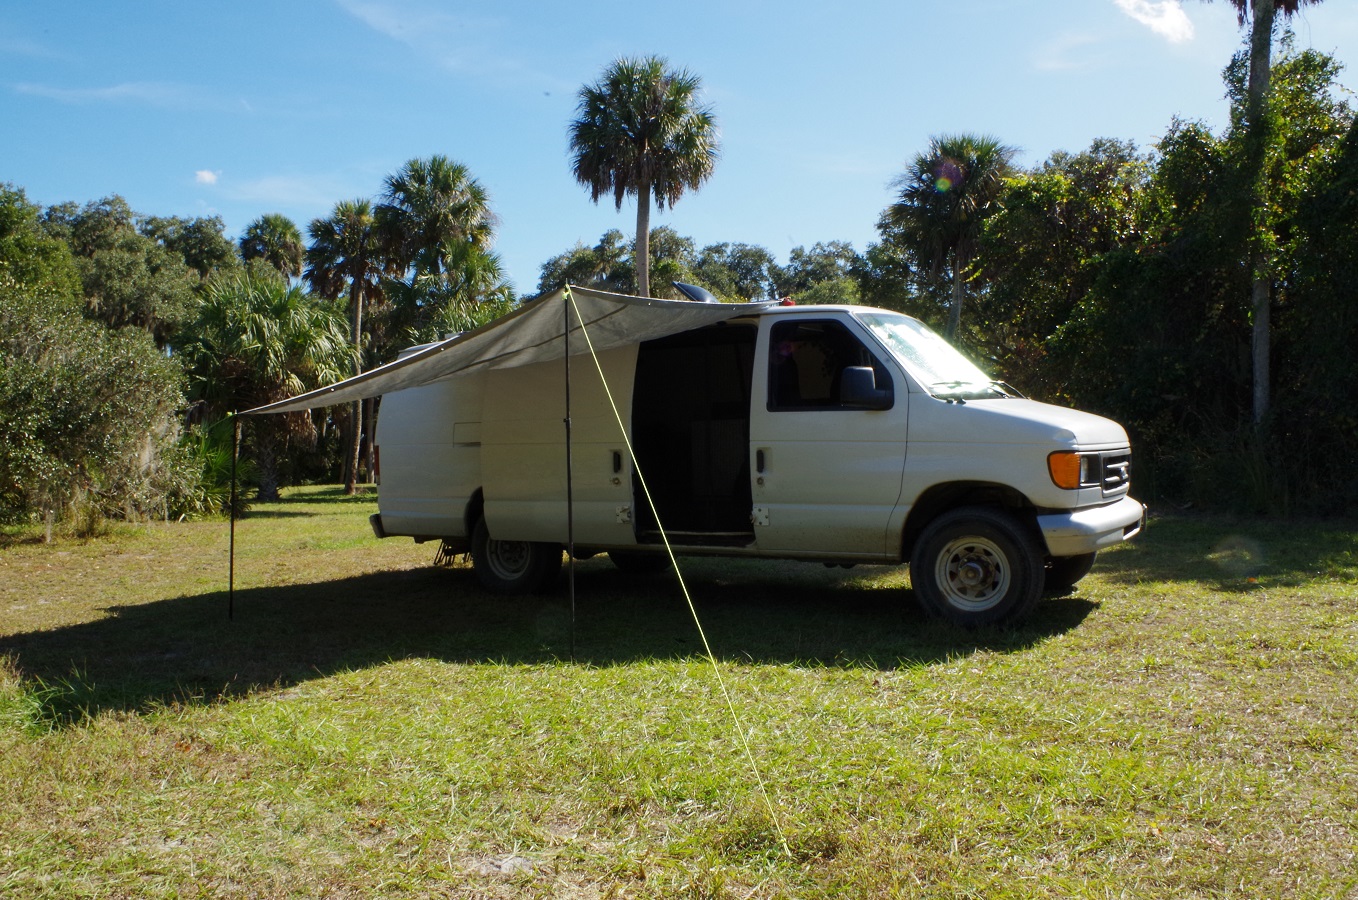
Extend the tarp poles to your desired height.
For shelter from rain, we recommend extending one side fully (~7ft) and keeping the second fairly short (~5ft); because the tarp isn’t a completely flat surface, we found that simply extending both poles fully caused water to pool by the van.
Step 6
Perhaps the trickiest bit.
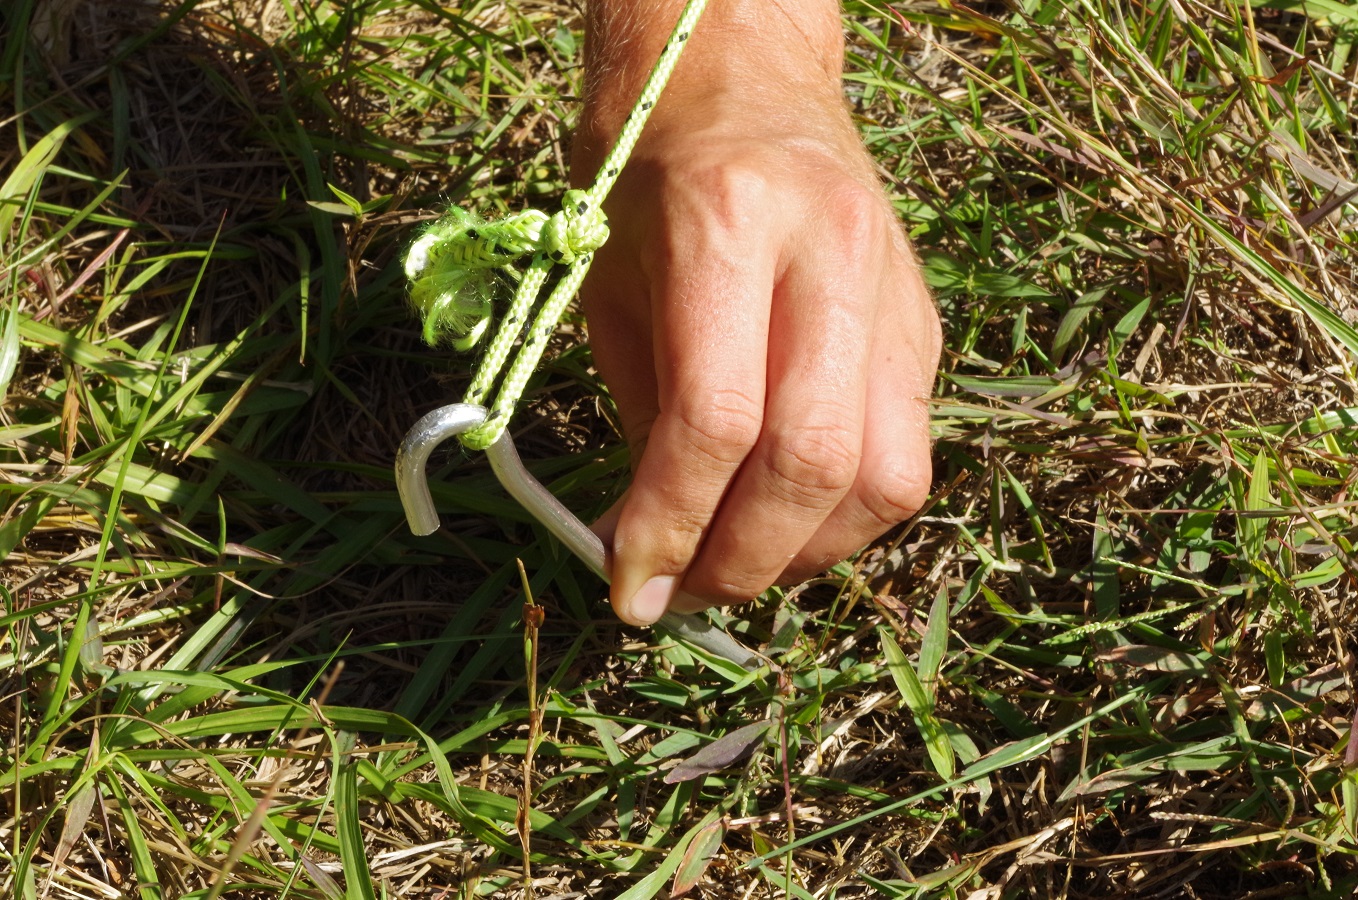
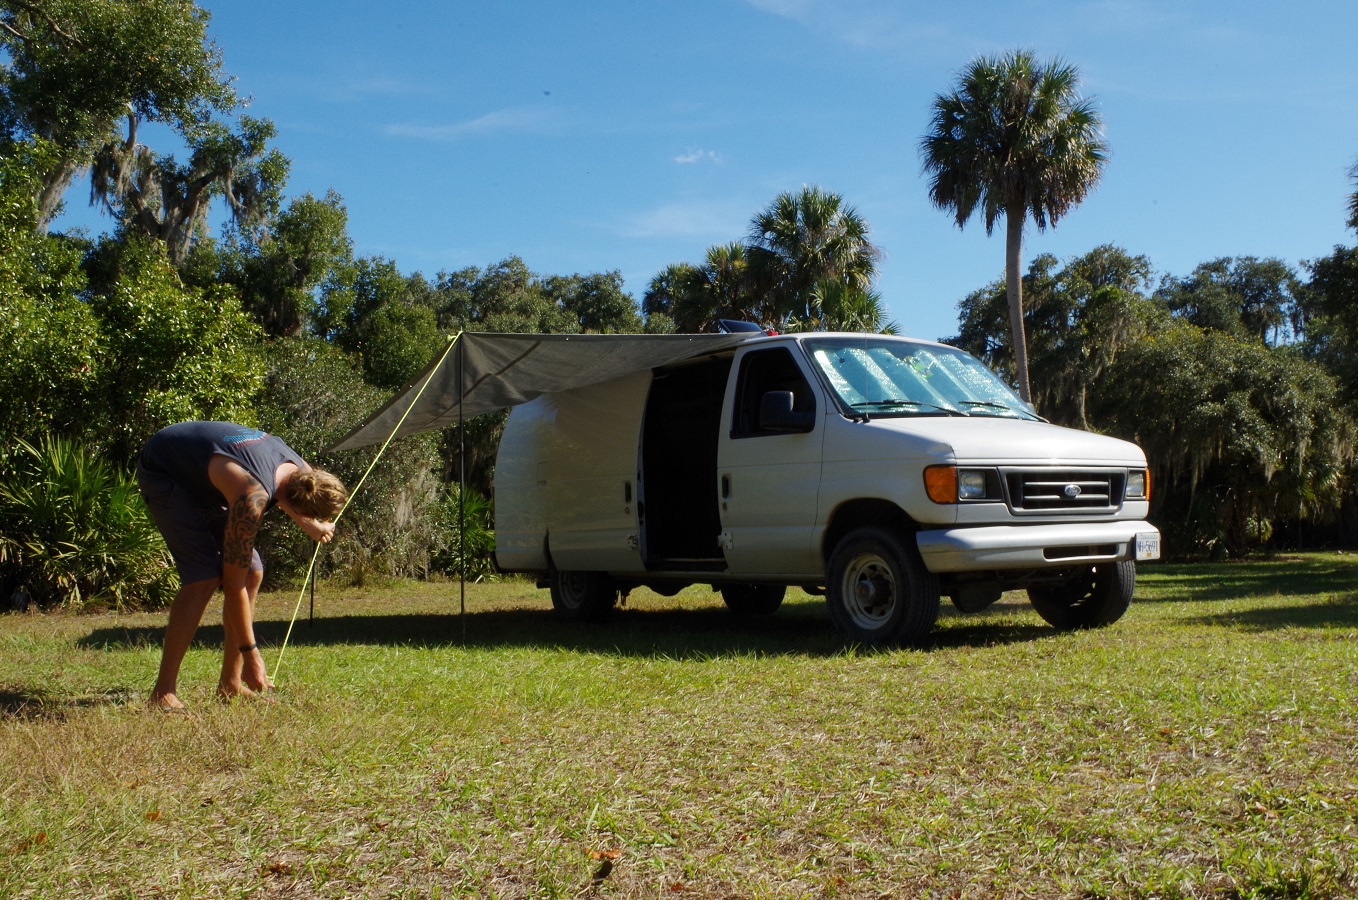
Keep the guy ropes taut – without pulling the magnets off! – as you secure the other end of the guy rope to the ground.
Just like setting up a tent, loop the guy rope around a tent peg and hammer it into the ground. We used the back of our hatchet for this, but a rock will do. Be resourceful!
That’s it!
6 different items; 6 different steps; maybe a little more than 6 minutes (initially, anyway); and done!
A DIY van awning for your road trip adventures, that won’t cost hundreds of dollars.
Disassembling
Packing it away is even easier.
After this initial set-up, we left the carabiners attached to the tarp. This saved them from getting lost plus it meant that when we unfolded the tarp for further set-ups, we knew which side to attach to the van. Obviously this latter benefit is obsolete if you purchase a square tarp.
Additional notes
While we think of our campervan canopy as that added luxury to our vanlife experience, we aim to be totally transparent and share that budget DIY projects like this do have their short-comings.
Limitations
#1 To set-up, soft ground is needed. The tent pegs won’t pierce concrete. “Who wants to be camping on concrete anyway?!”, we say.
#2 The main limitation of this campervan canopy is it will not sustain strong winds. In all honesty, it didn’t like wind very much at all.
This was thankfully never a huge issue for us. We were chasing some winter sun around the States and Mexico and didn’t really have a desire to sit out when it was windy and raining anyway.
On a couple of occasions we left the awning set-up over night when the wind picked up… The tarp can act as a sail, lifting the magnets off the van. It’s a minor gripe to deal with.
To combat this, we have recommended above stronger magnets to strengthen your campervan canopy. Furthermore, there is the option to add a third, or even forth, magnet.
Just keep in mind that these are the priciest components of this DIY van awning and the whole purpose of building this on a budget, is to do just that!
A wise decision?
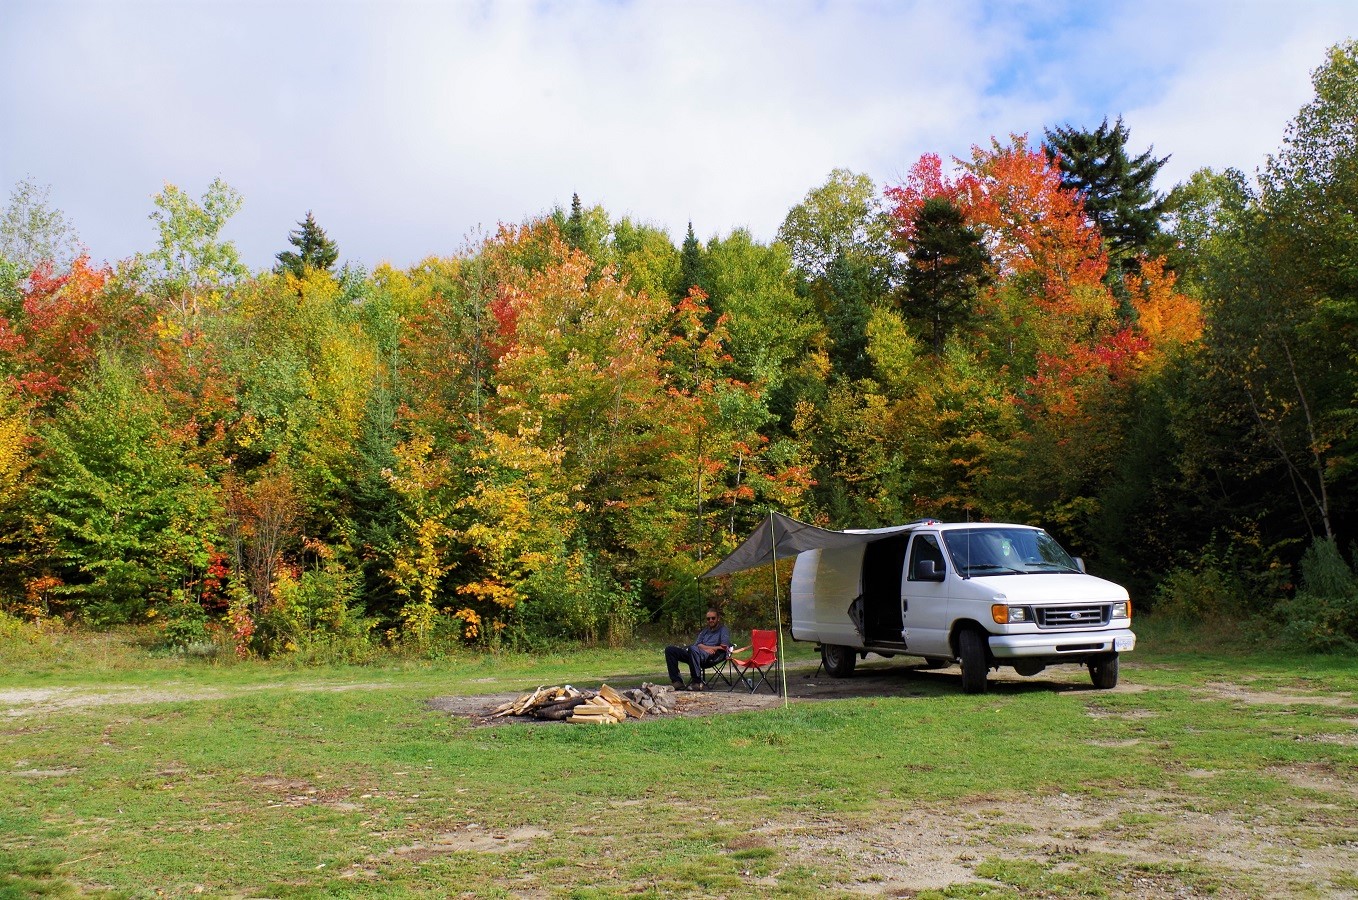
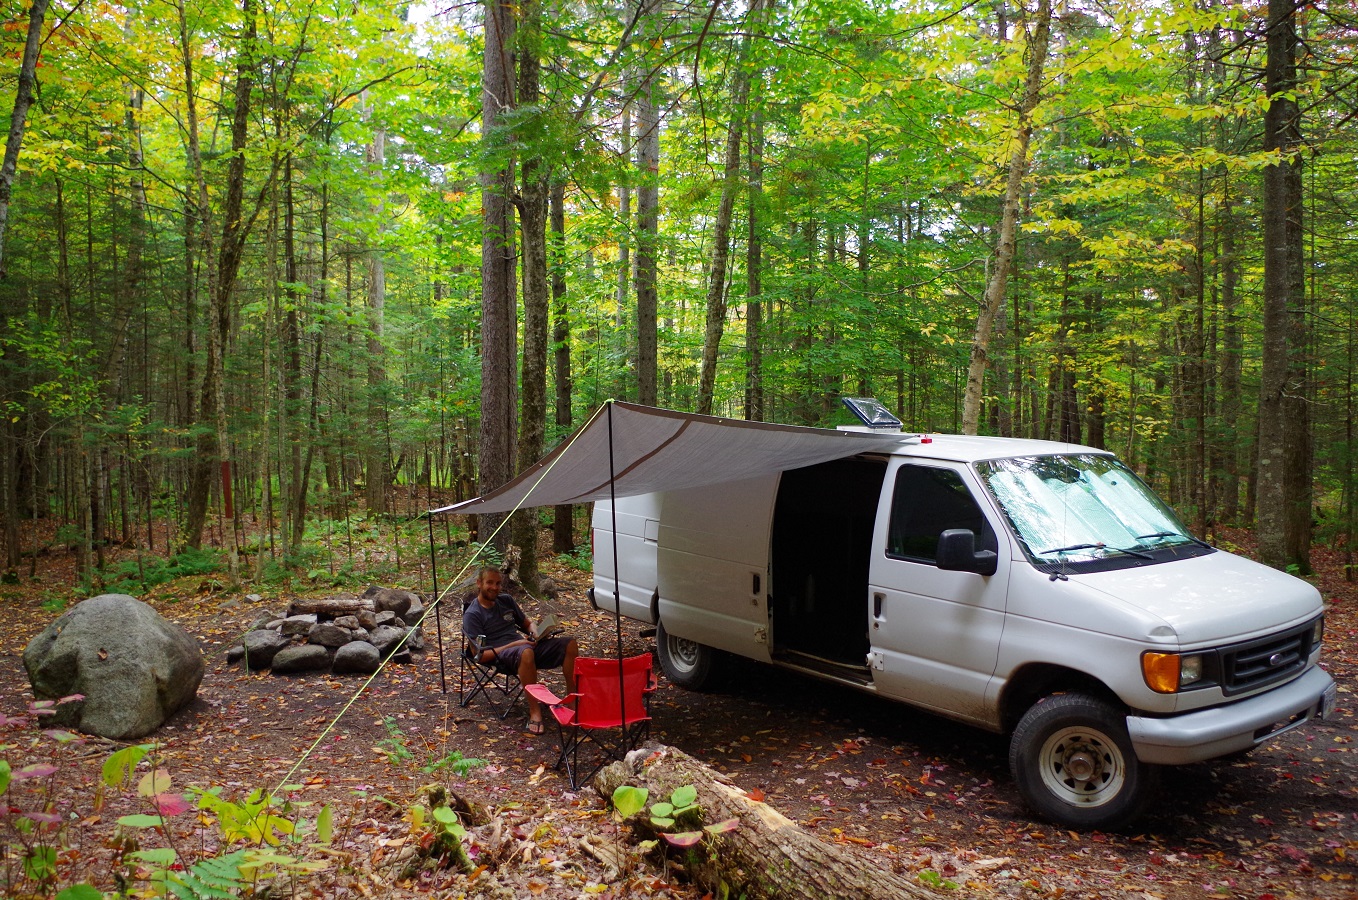
We spent nine whole months on the road travelling in our van. During this time, we never regretted the decision to build our own budget awning.
In fact, we felt a small sense of pride every time we set it up and would begin to hear the pitter-patter of raindrops that would have otherwise forced us inside. It was the sound of success!
Not to mention, this awning kept us cool on baking hot days down south in Florida and Mexico.
Good luck!
We hope our detailed guide on how to build a DIY budget awning has proved fruitful in your research and want to wish you the best of luck with your vanlife build.
If you took any inspiration from this post, please leave us a comment! We would love to know how your campervan canopy works out.
Happy camping!